To connect to the ŠD UMB computer network, it is necessary to implement several successive steps. Therefore, we recommend to carefully study the tutorial.
Launch of Windows services "Wired AutoConfig" (Wirelles Zero Configuration)
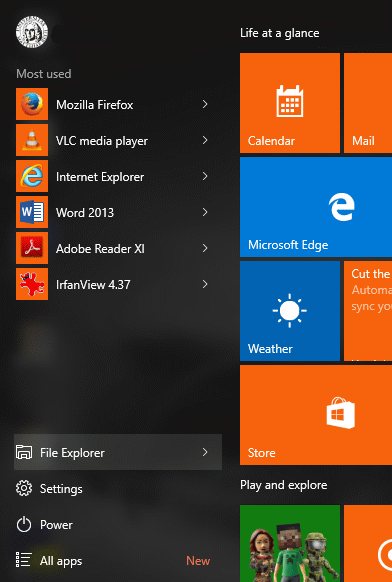
1. Start for Windows 10 click on "File Explorer".
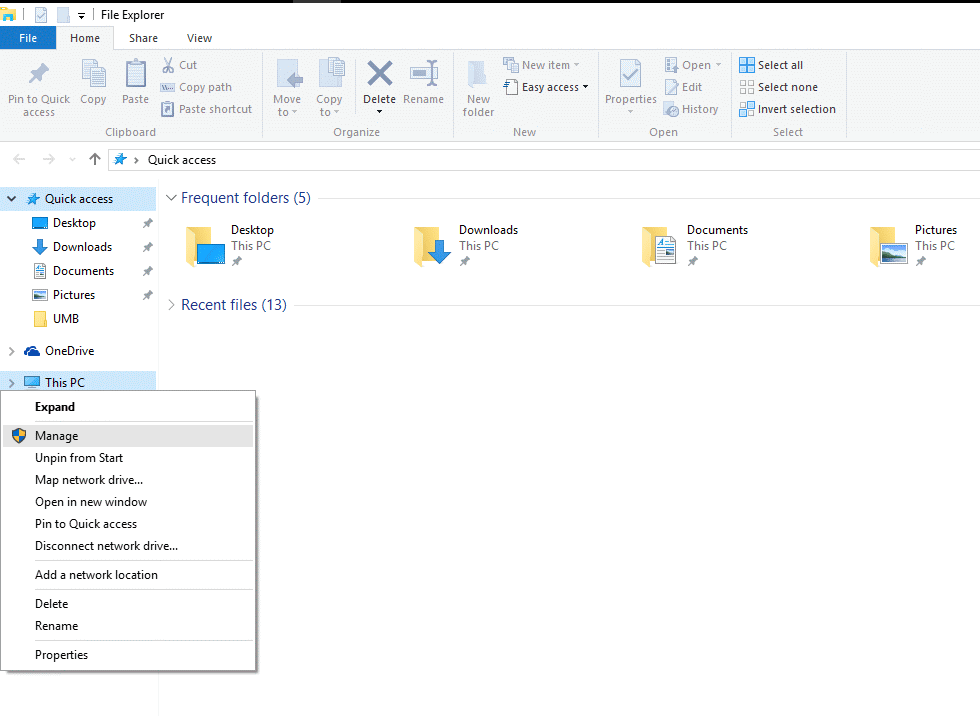
2. In the following window, click the right button of the computer mouse to "This PC" and click on offer "Manage".
3. 3. In the following window click on"Services and Applications" and then (double) click on the option "Services".
From the offer of services (Services) select the service "Wired AutoConfig" and click on it (double).
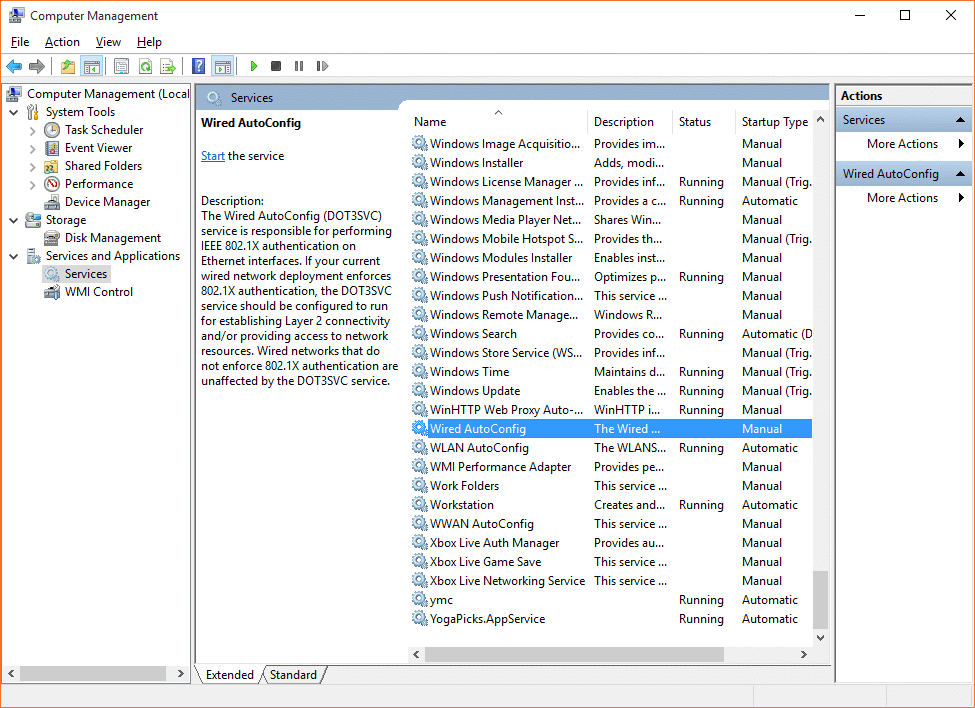
4. 4. The following window is displayed:
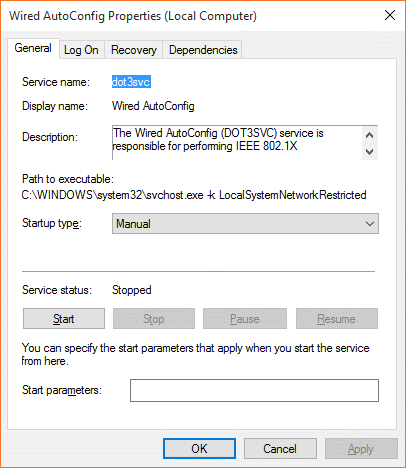
5. In the window "Wired AutoConfig Properties" it is necessary to implement the settings exactly according to the image.
Option "Startup type" Set "Automatic", then click on "Start", subsequently after the start of the service
(Service status: Running) click on "Apply" and then click on "OK".
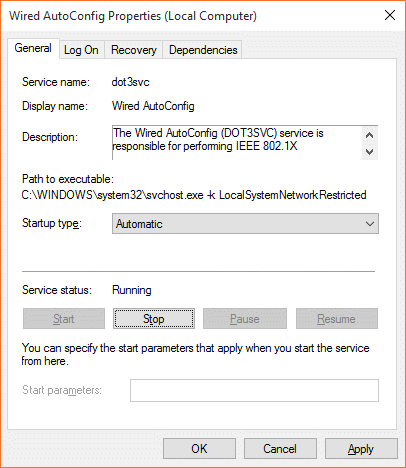
Setting the network environment and authentication
6. Windows 10 (taskbar) is located in the right corner of the icon for connecting to the computer network,
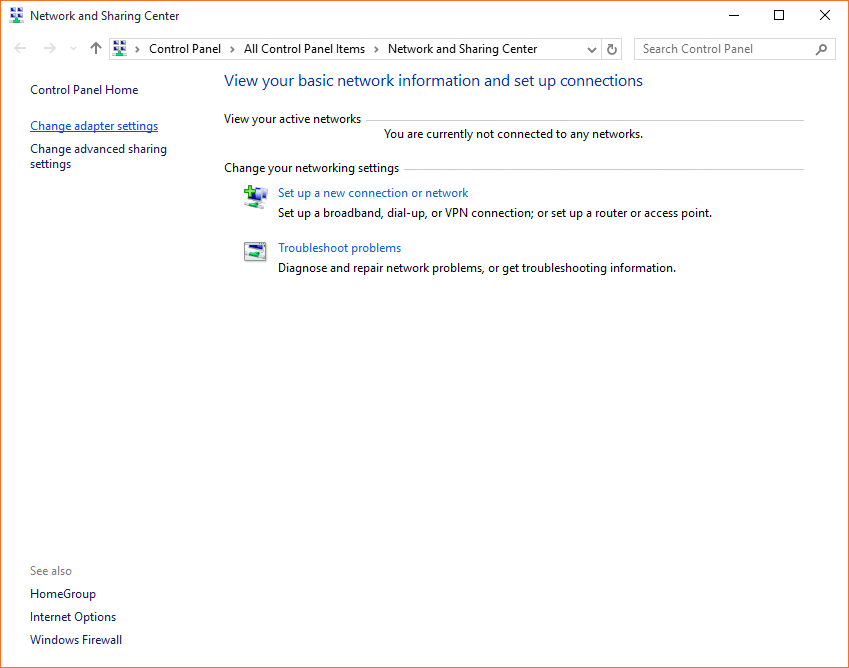
click on the icon with the right button of the computer mouse and click on the option "Open Network and Sharing Center".

7. 7. The following window is displayed, click on the option "Change adapter settings".
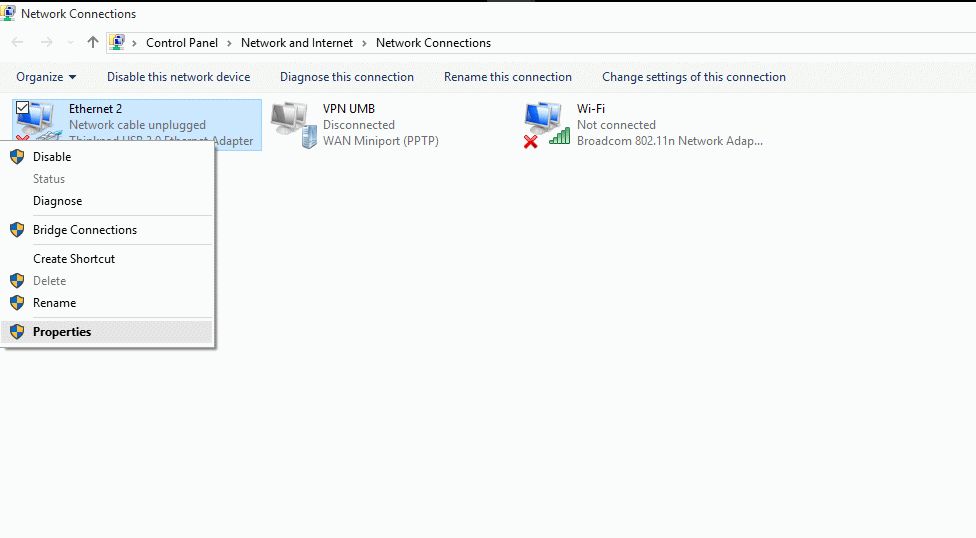
8. 8. In the window "Network Connections" click the right button of the computer mouse to set the network adapter"Ethernet"
and click on the option "Properties".
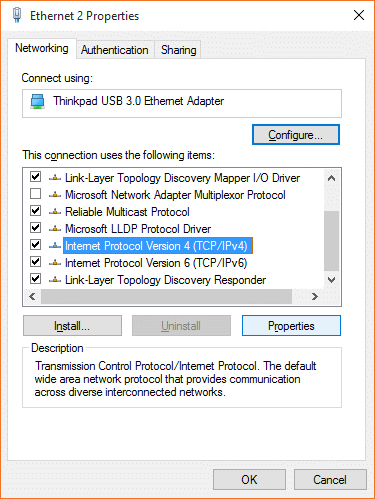
9. The following window is displayed. Select option "Internet Protocol version 4 (TCP/IPv4)"
and click on "Properties".
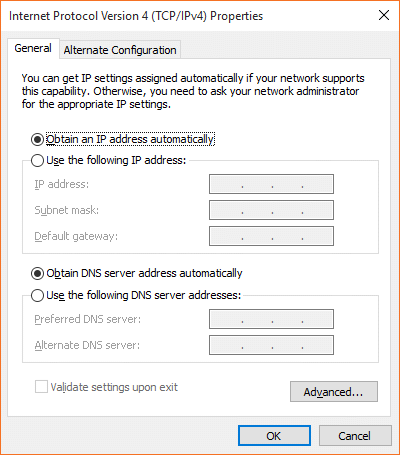
10. In the following window "Internet Protocol version 4 (TCP/IPv4) Properties" check settings.
They must be the same as the following picture. Click on to close the window "OK".
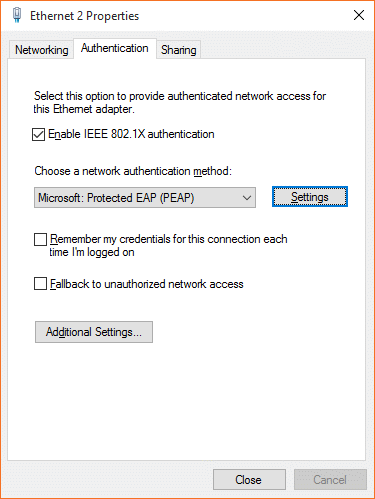
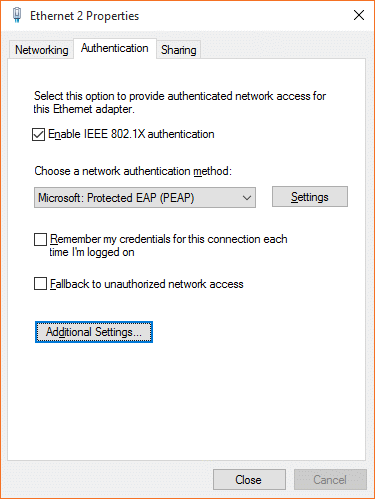
11. In the window "Ethernet Properties" Click on the card "Authentication", on which you leave the tick
option "Enable IEEE 802.1X authentication" and in other options, cancel the tick
exactly by image. Then click on "Settings".
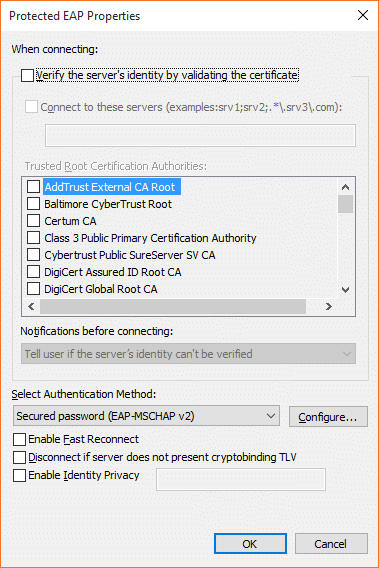
12. In the following tab, cancel the tick of all options exactly according to the picture and then
in parts "Select Authentication Method" Click on"Configure".
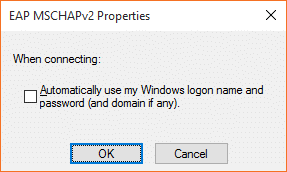
13. Cancel the tick"Automatically use my Windows logon name and password (and domain if any)"
and click on "OK". Then click on the tab below "Protected EAP Properties"
on "OK".
14. 14. In the following window, click on the tab "Authetication" option"Additional Settings".
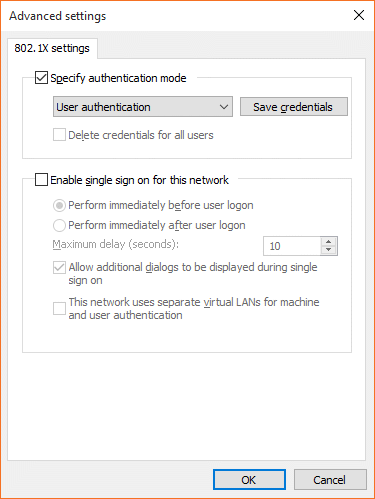
15. The following window is displayed. Check the option "Specify authetication mode" a
Set"User authentication" exactly by image. Click on "OK". Then in the window
"Ethernet Properties" Click on "Close".
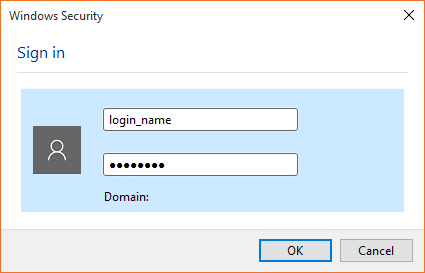
16. After connecting your device (notebook) to the socket for connecting to the computer network
(ŠD UMB) will show you the following window. Enter your login name
a Your password (specific login data as to account UMB) and click on "OK".
17. After successful verification connects you to the SD UMB network. The following picture is the icon
displaying the functional network connection (on the right side next to the icons of the striking speaker).
