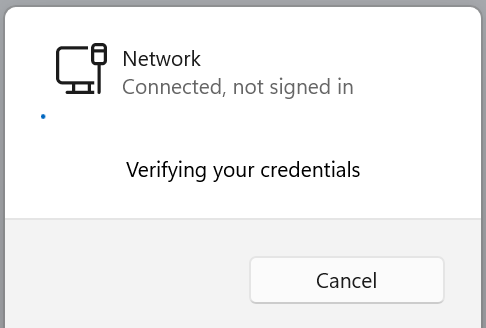
To connect to the ŠD UMB computer network, it is necessary to implement several successive steps. Therefore, we recommend to carefully study the tutorial.
Launch of Windows services "Wired AutoConfig" (Wirelles Zero Configuration)
Setting the network environment and authentication
- Click on the bow button in the lower bar

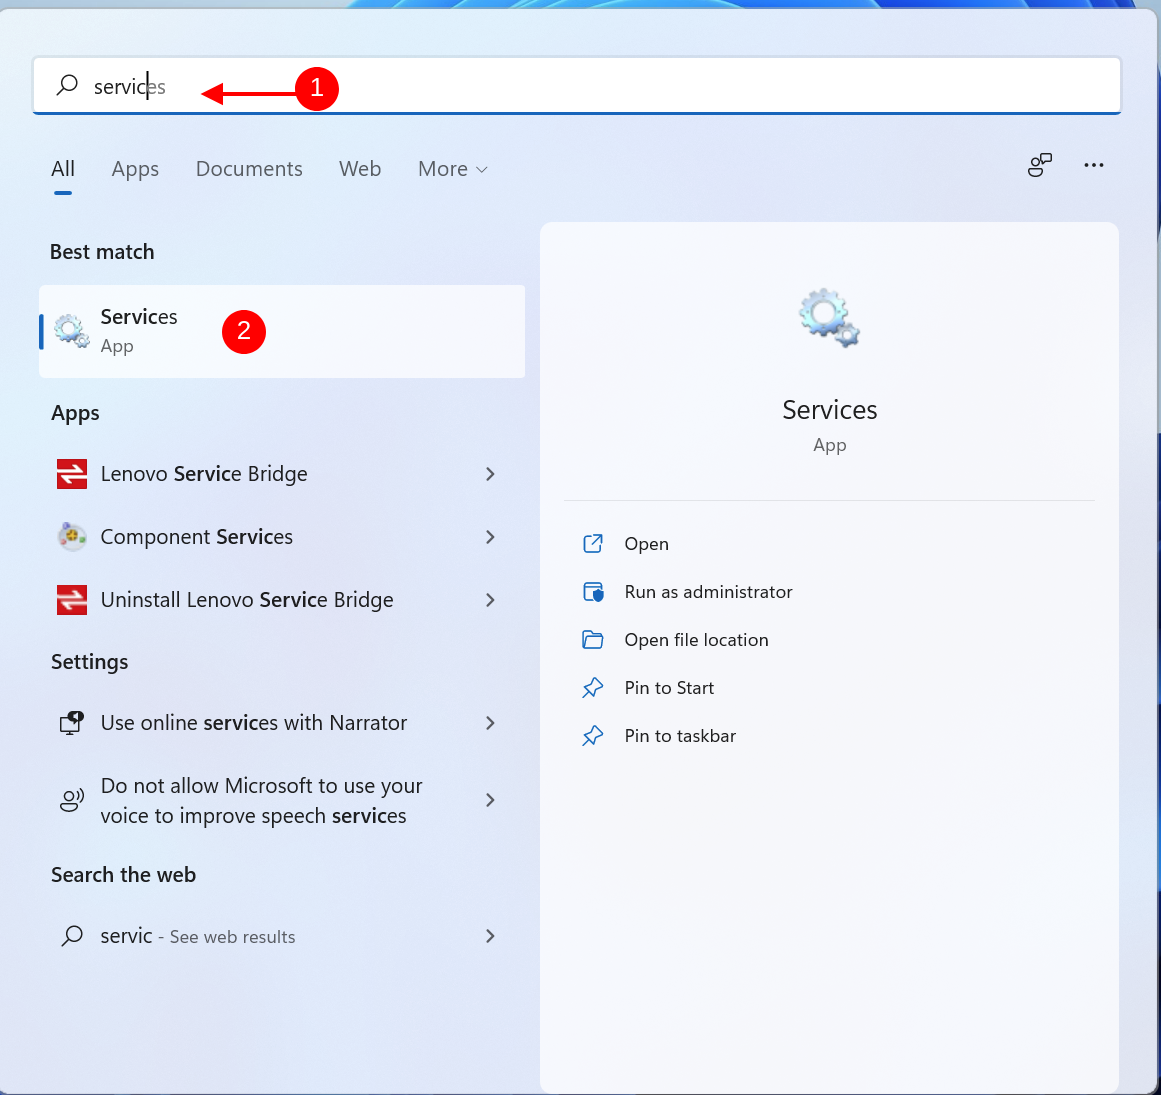
- We start writing Services and click on the first items found
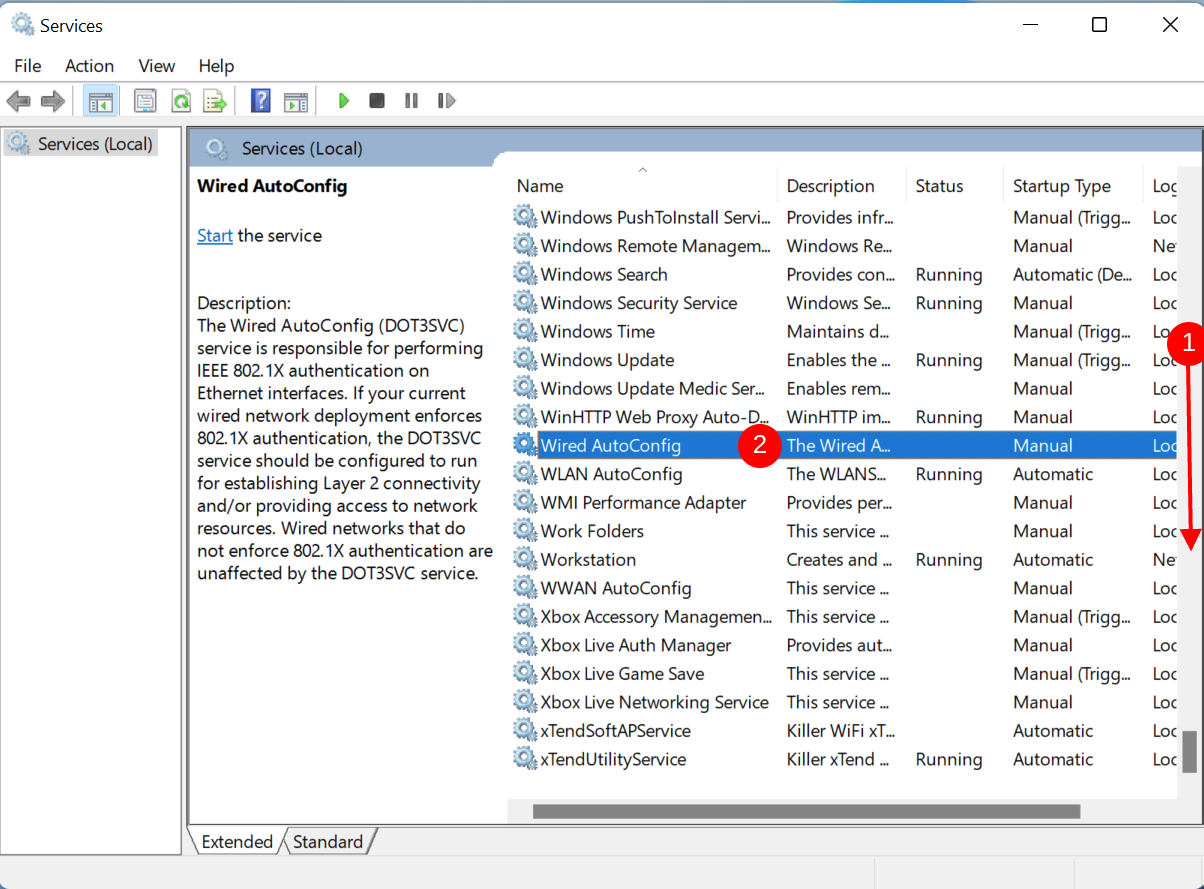
- In the displayed window we will find the item Wired AutoConfig and open it with a pair of clicks
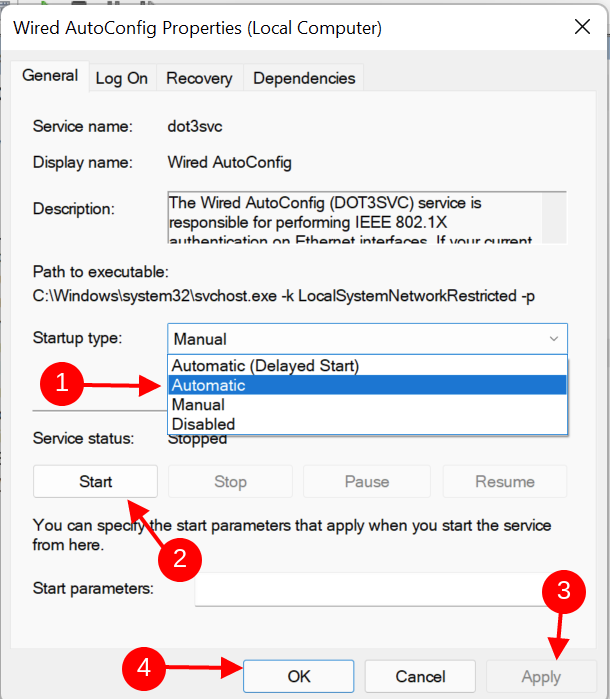
- In settings Wired AutoConfig Change Startup type from Manual on Automatic and click the start button and then we only apply new settings and click OK
Then close the window Services
Setting a network adapter
- Open Control Panel using the search window where we start writing “Fruits the system automatically complements the rest or “Control” and from the menu we choose the option Network and Internet
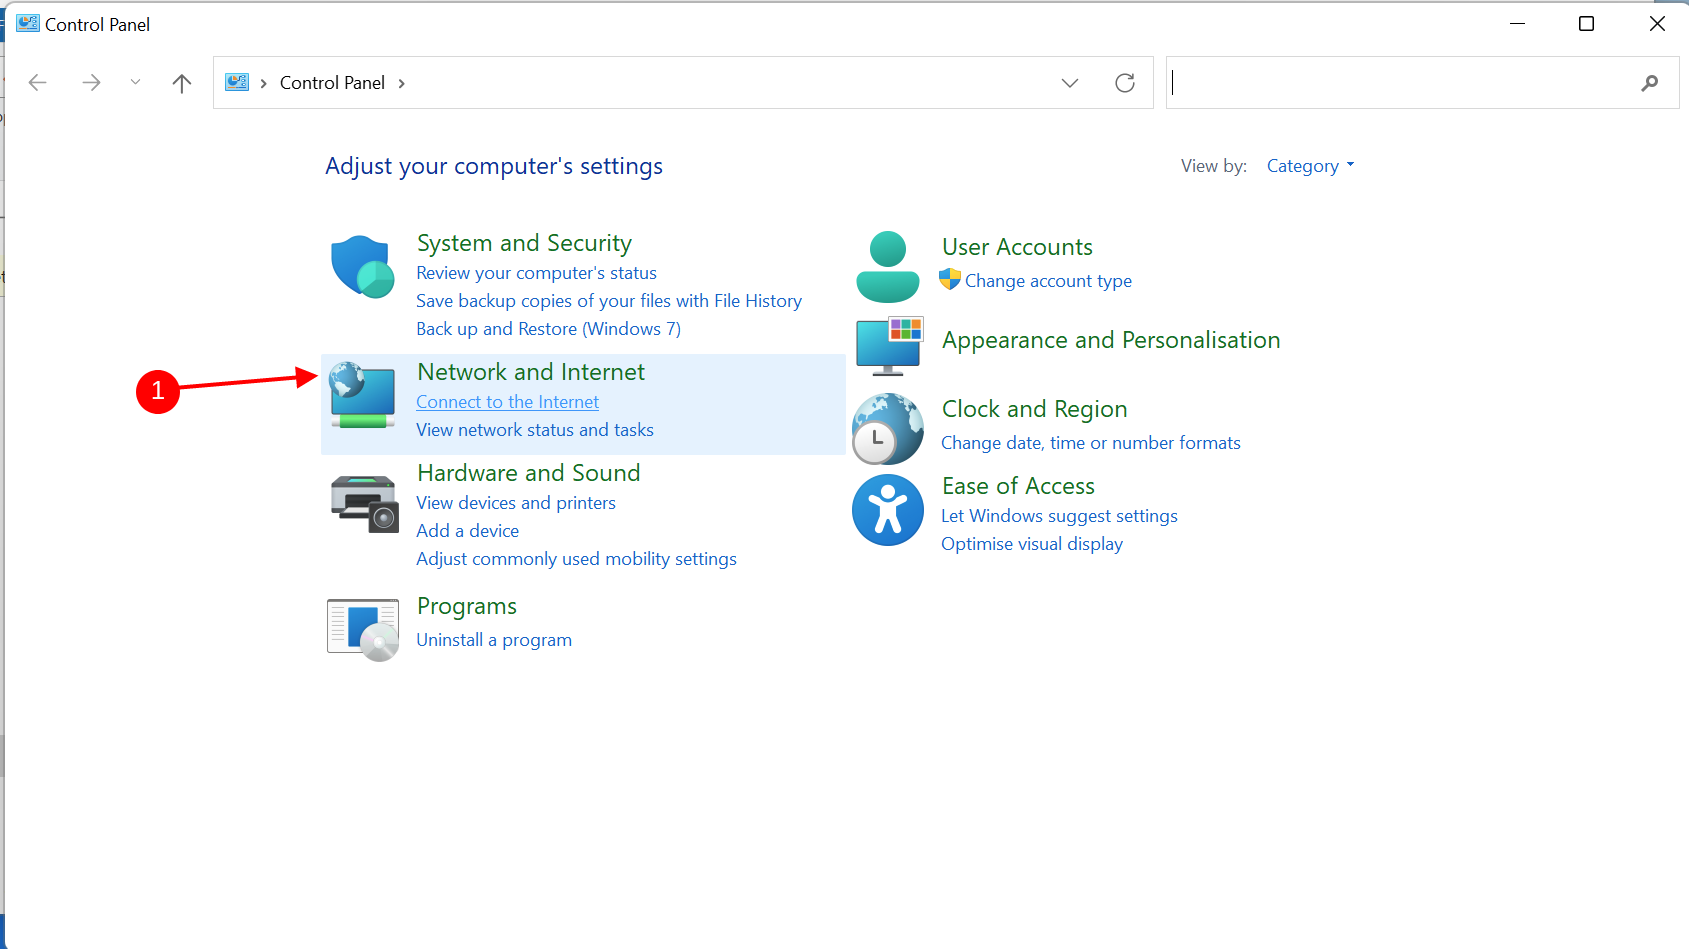
- Then click on Network and Sharing Centre
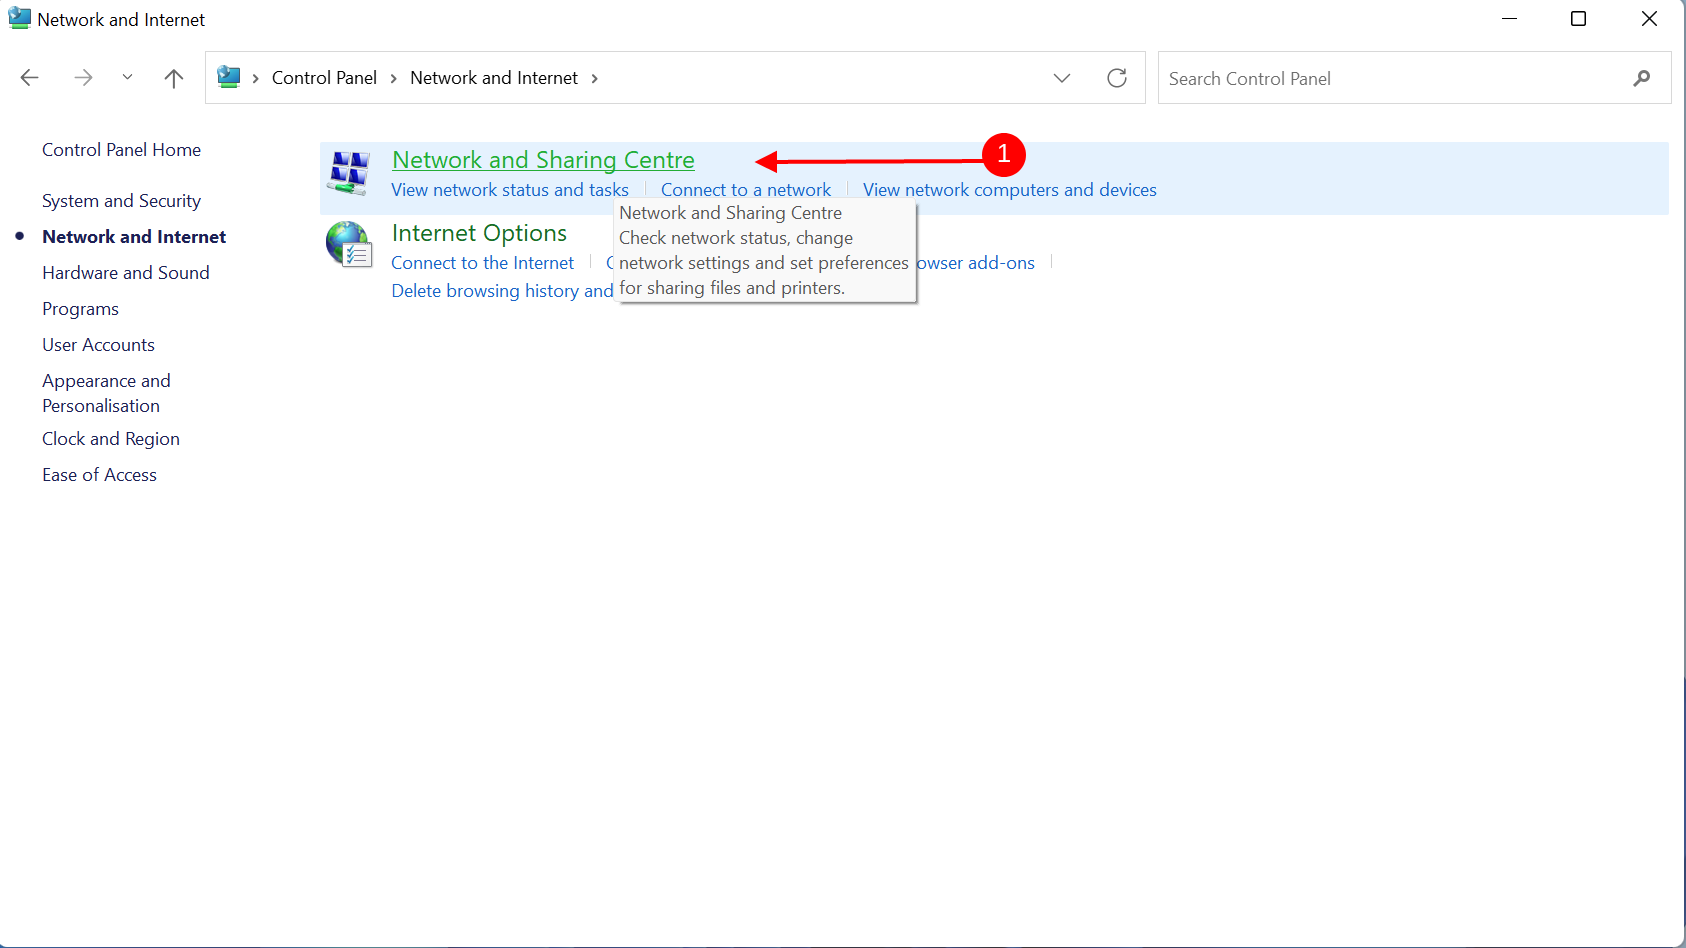
- In the displayed window we click on Change adaptor settings
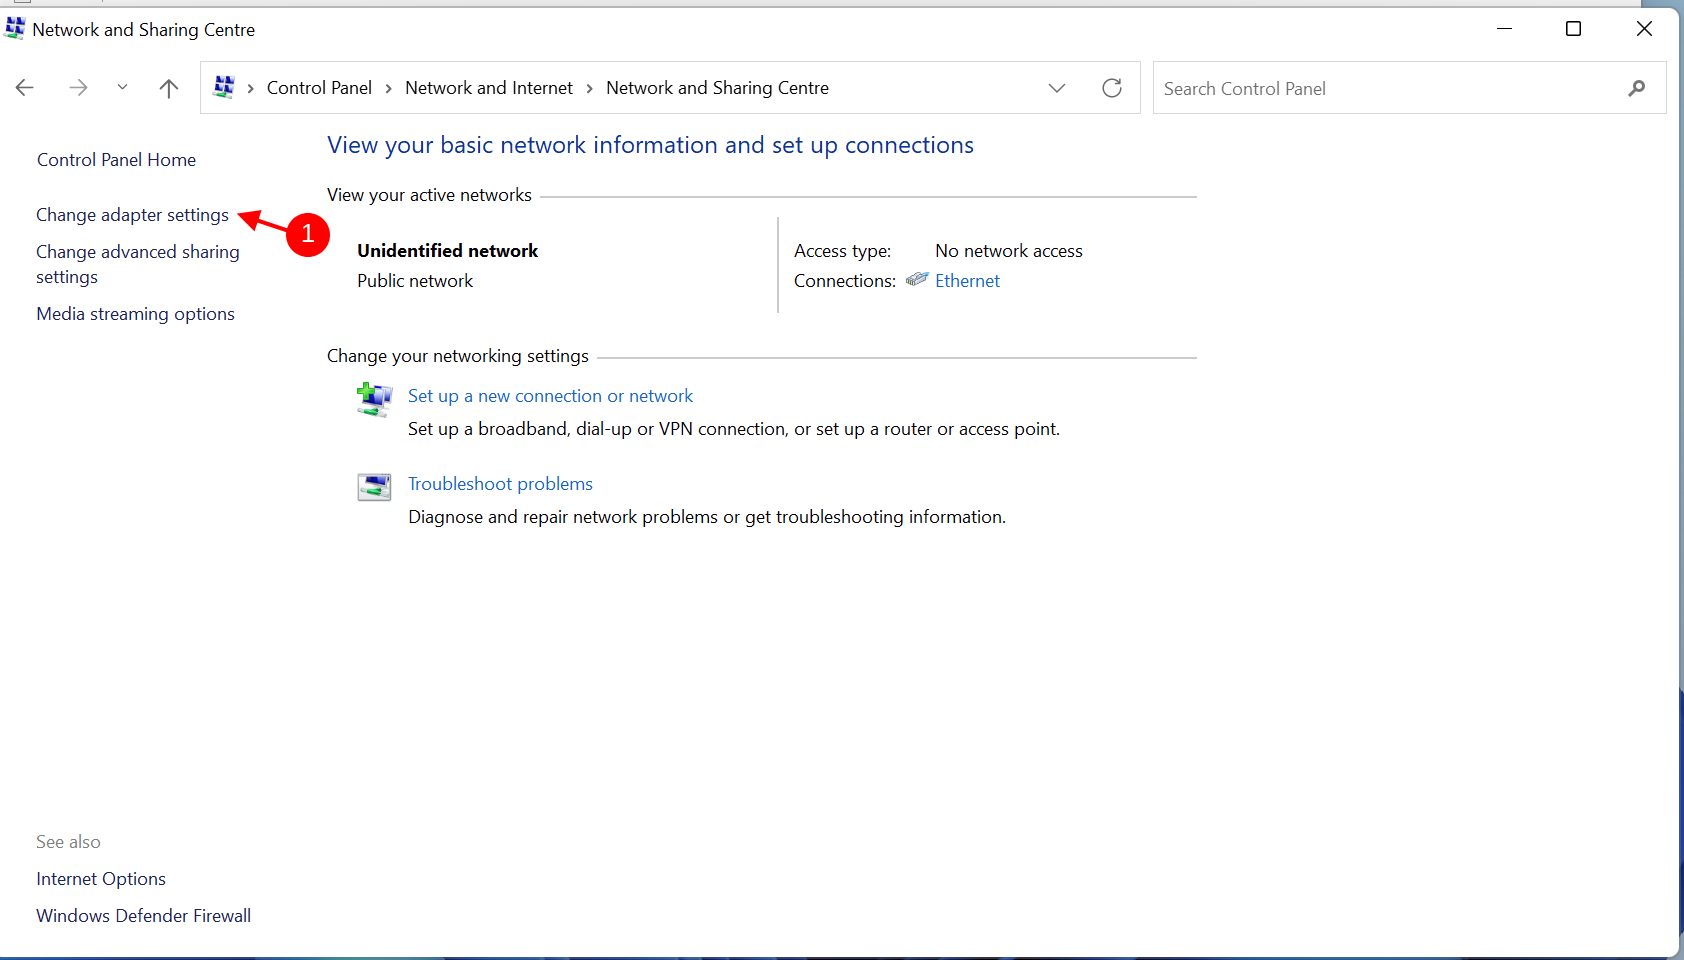
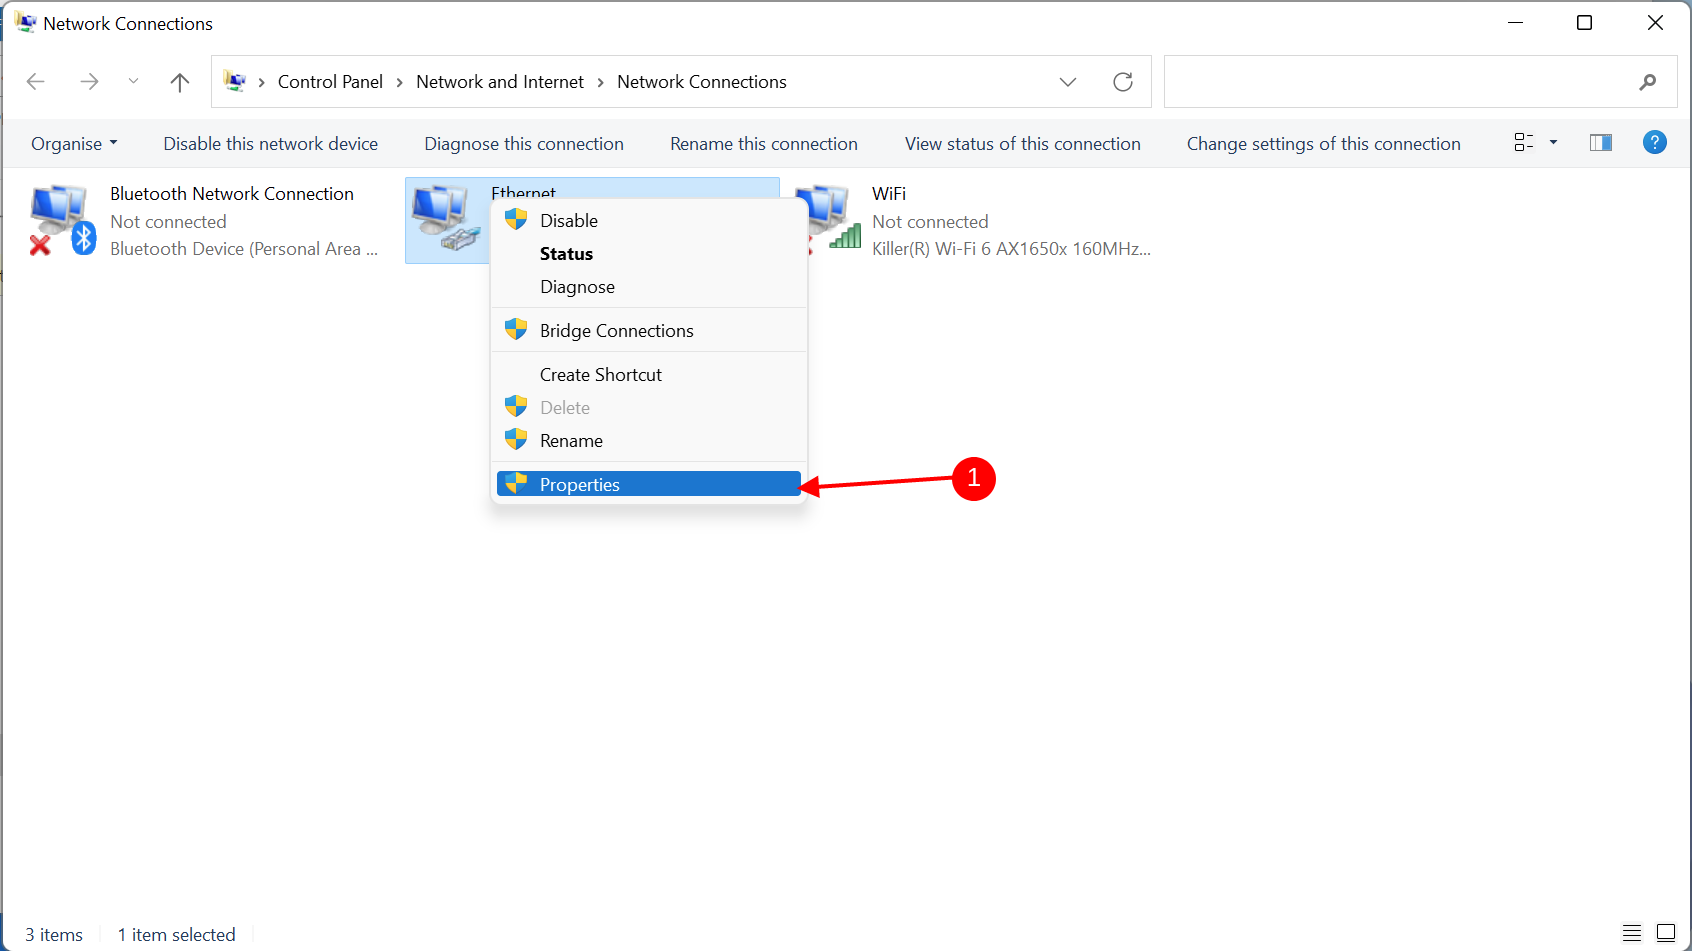
- In open window, internet adapters and we choose Ethernet Adapter and click on the button and select Properties
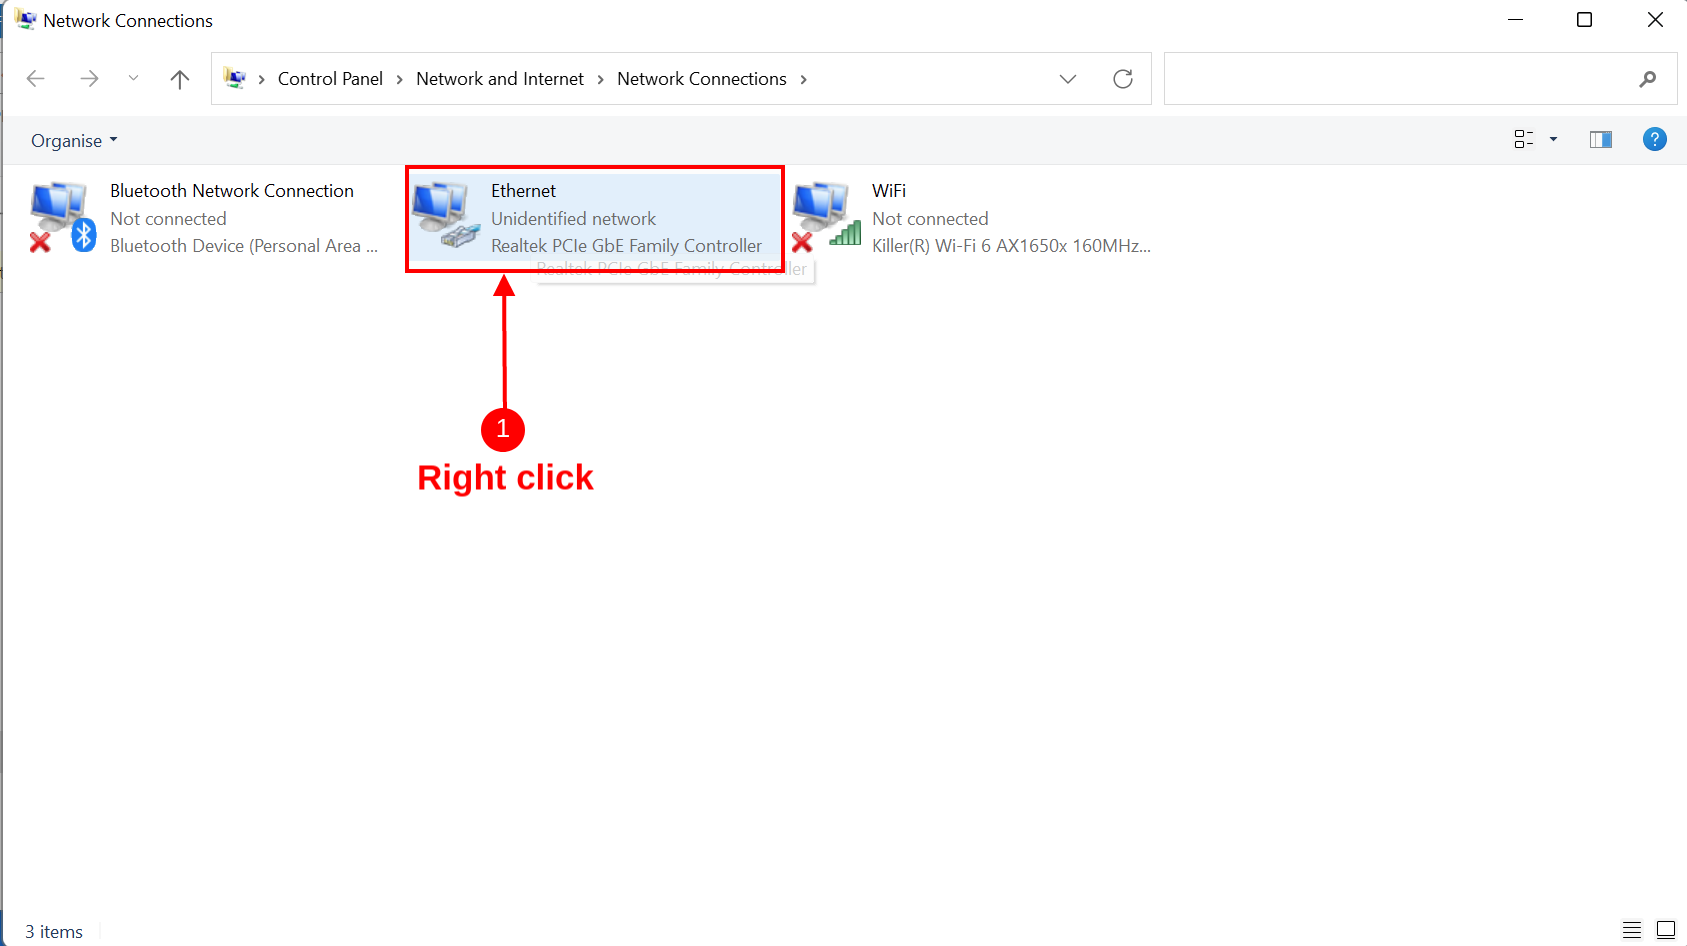
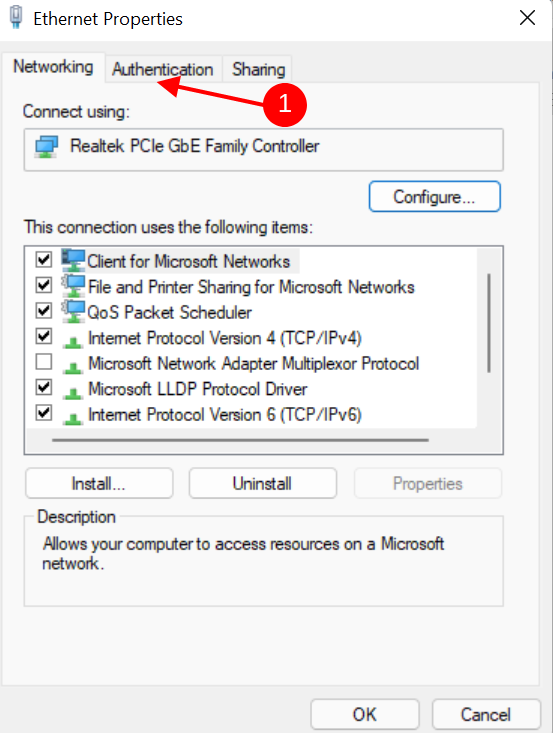
- In the displayed window click on the tab Authentication
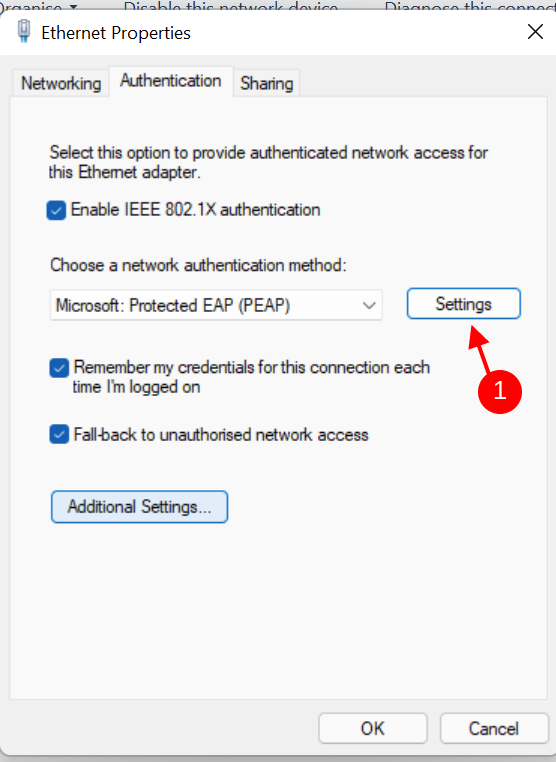
- In the displayed window we click on Settings
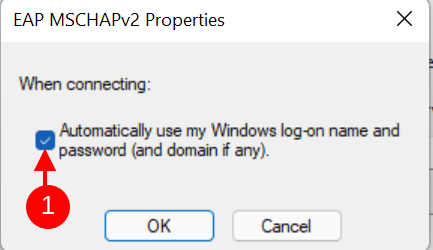
- We will see the following window where we click on the button Configure
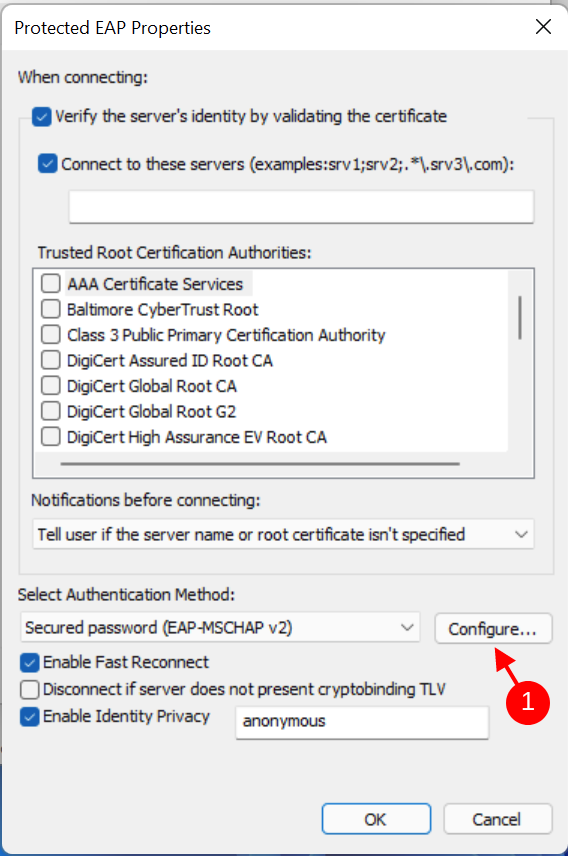
- Then in the next window we cancel the check and click OK button
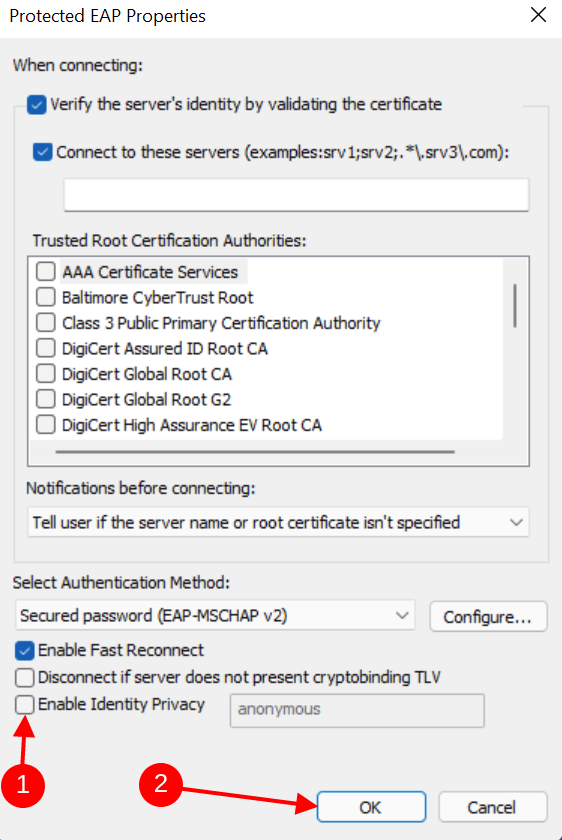
- Then in the window Protected EAP Properties we cancel the tick Enable Identity Privacy click OK
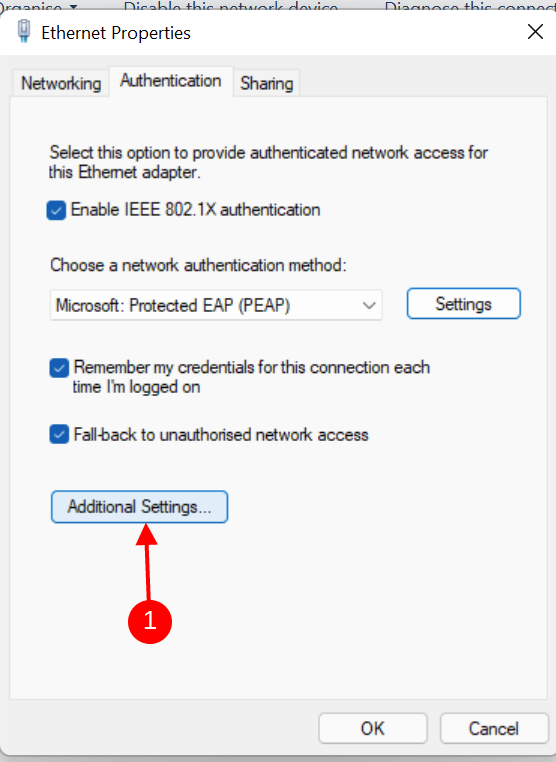
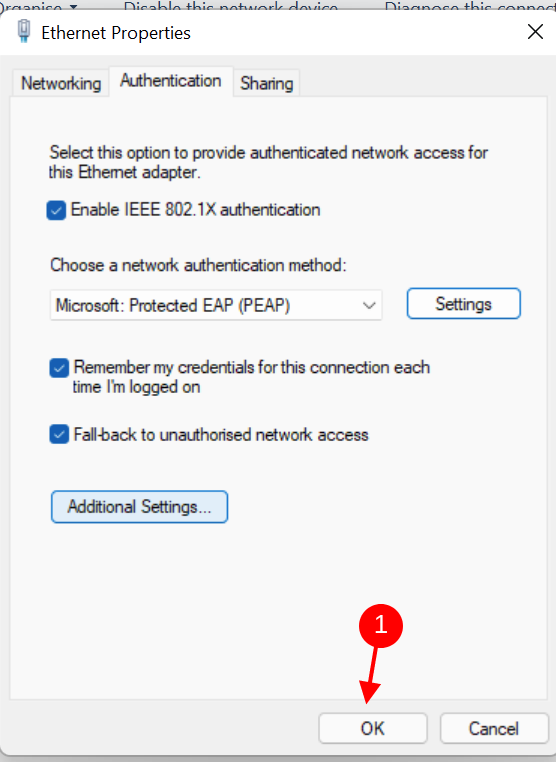
- Then in the Ethernet Properties window and the Authentication tab we click on the button Additional Settings ...
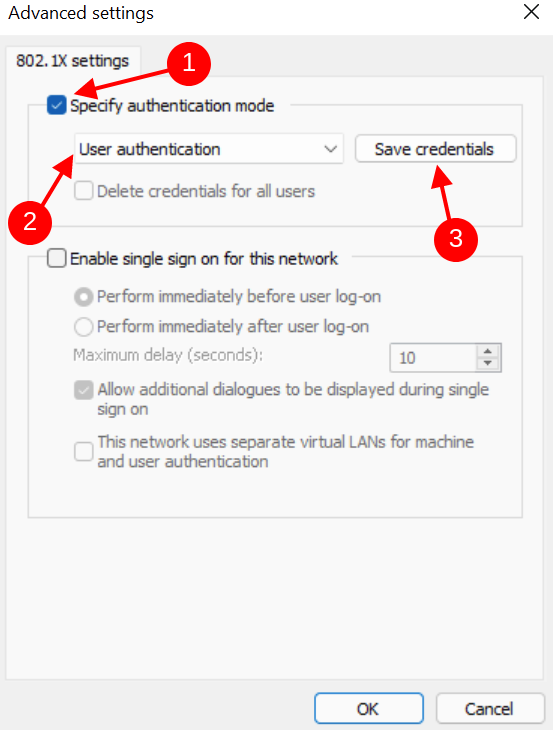
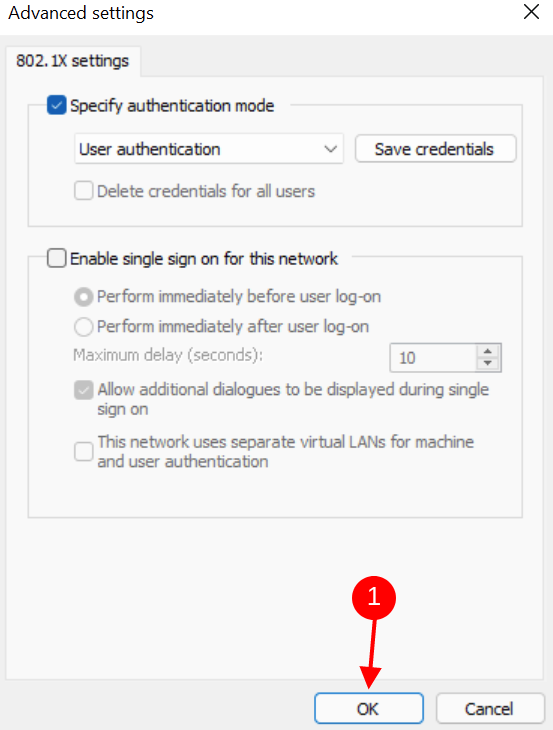
- We see the following window where we check Specify authentiacion mode and from the offer we choose User authentication and click on Save credentials
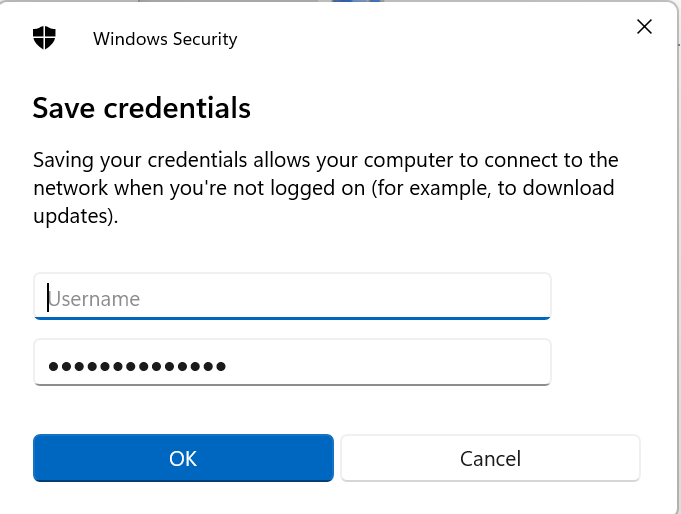
- After clicking on Save credentials we will see the window where we enter the login data to the UMB system without any extensions or prefixes and click OK button
- Then we only confirm all windows OK button
- If we proceeded correctly we will see the following window where we click on Sign In
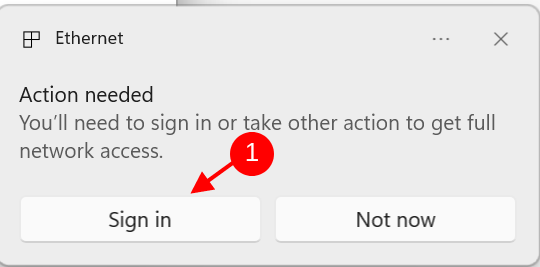
- Then the system opens us another window where we click again Sing In
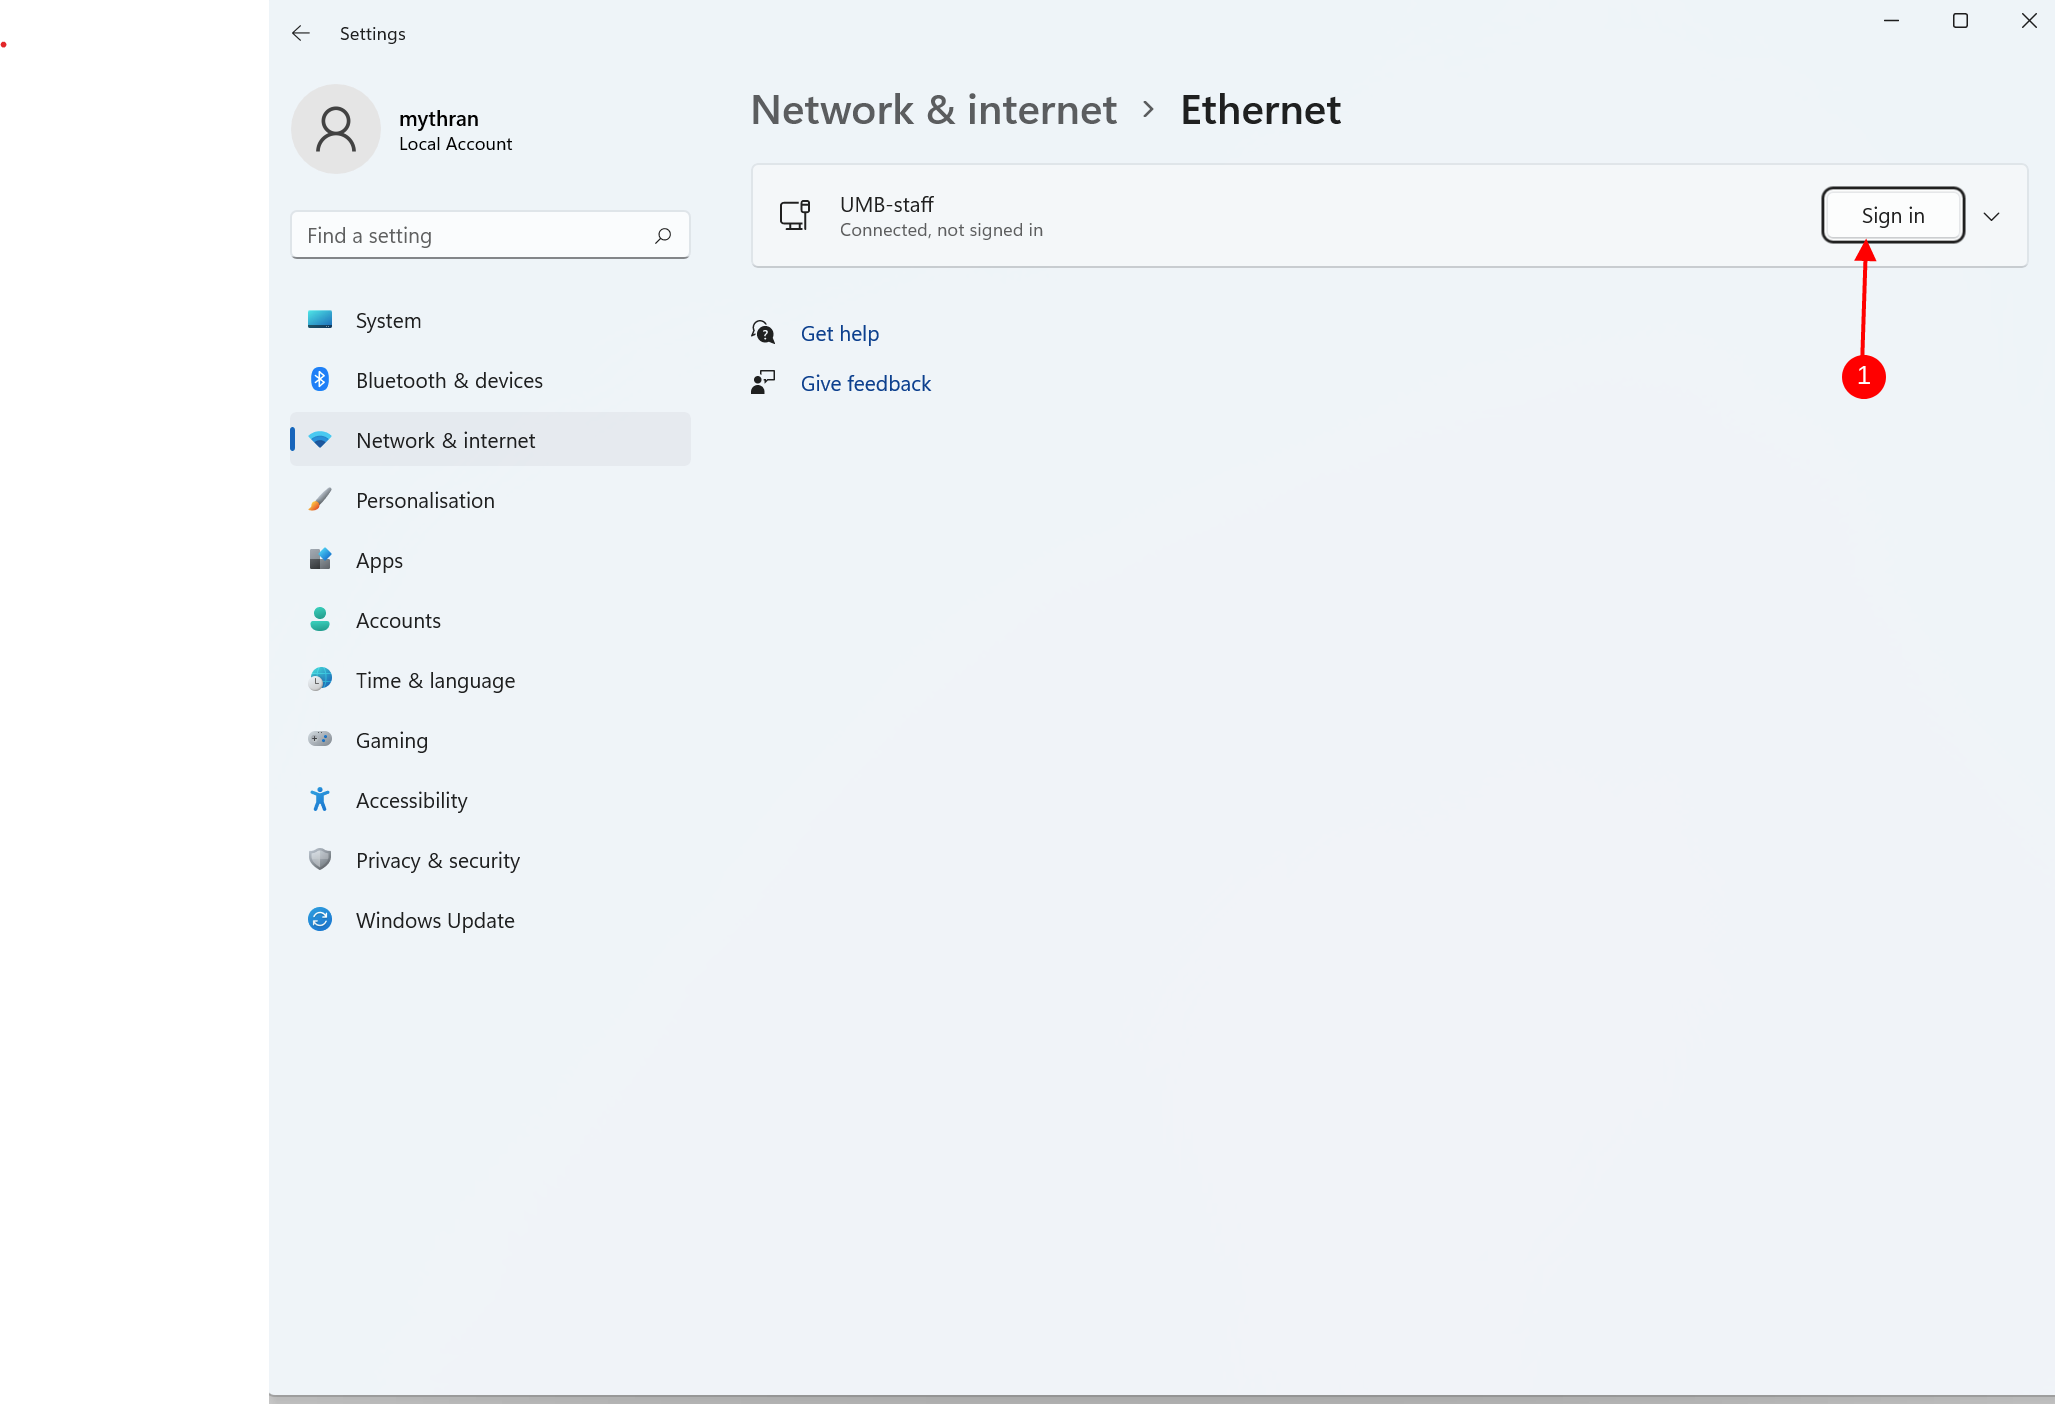
- After that, the following window will appear to us, which if we entered the correct login data will verify us and connect to the Internet
